
Guarantees
What is a guarantee?
Section titled “What is a guarantee?”A guarantee is a promise you make to customers, for example a 7-year warranty, a 48-hour response time, or lifetime workmanship. You build a library of guarantees once, then add the ones you want to each quote. They appear to the customer on the quote under a Guarantees heading, and on the quote PDF.
Each guarantee has:
- A name: the short promise (e.g. “7-year warranty”).
- A value badge (optional): a highlighted detail shown next to the name (e.g. “Parts & labour” or “$100 if late”).
- A description: the full wording the customer sees when they open the guarantee.
- An icon: a small picture chosen from a set of presets (a shield, clock, award, and more).
Where to find guarantees
Section titled “Where to find guarantees”Go to Settings → Guarantees.
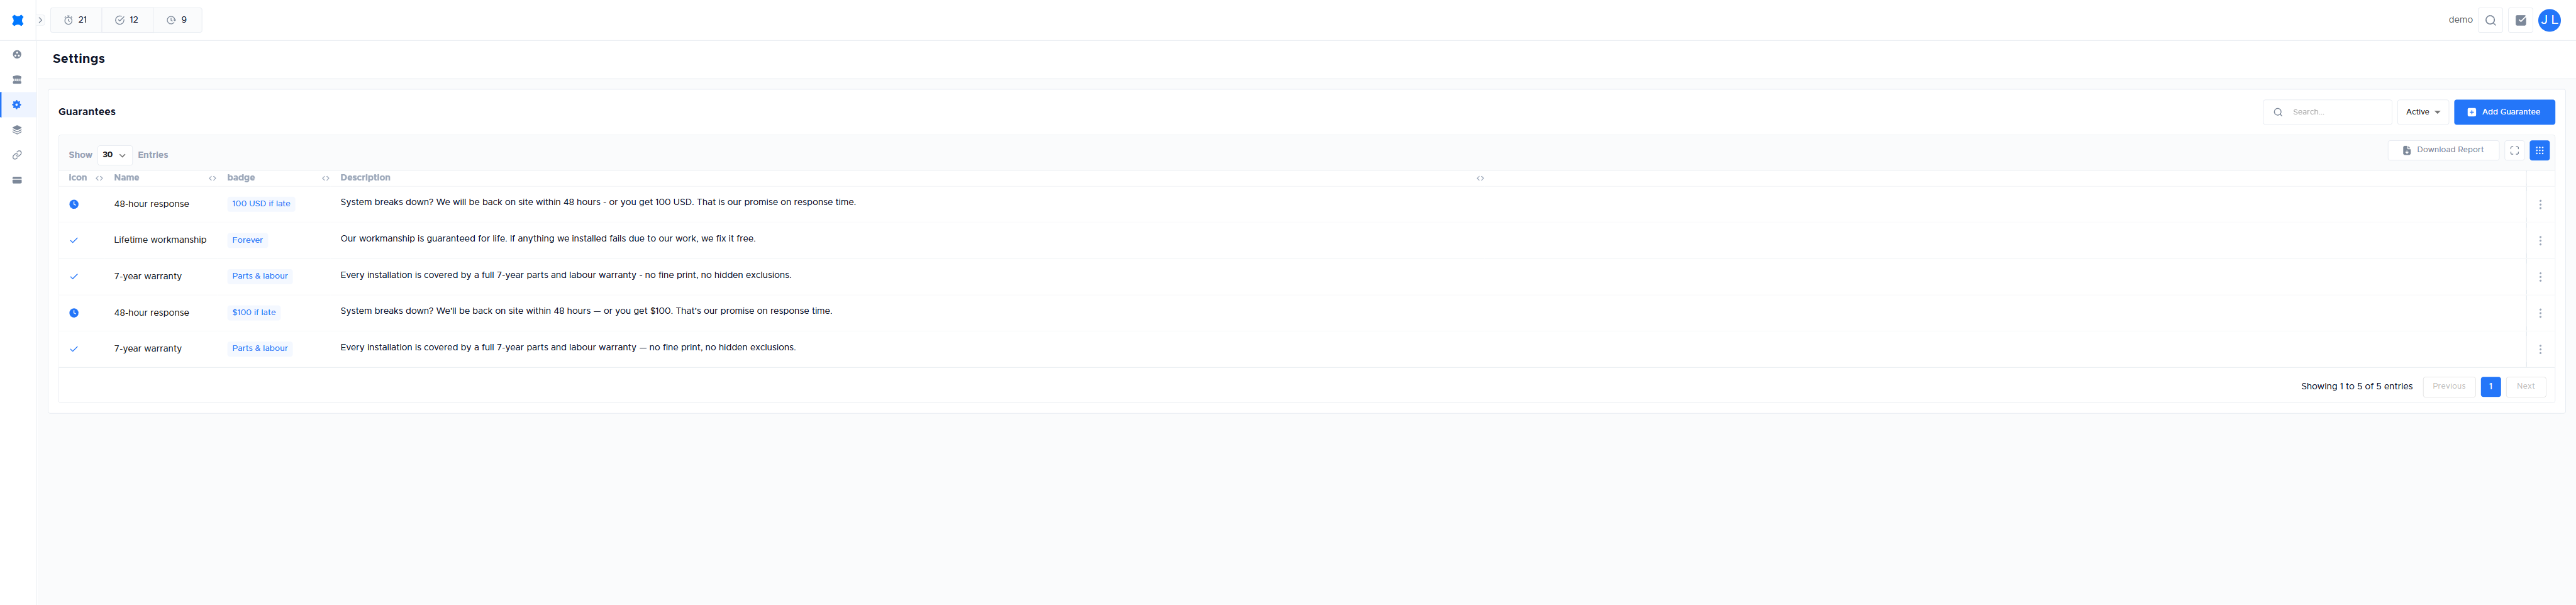
Creating a guarantee
Section titled “Creating a guarantee”-
Go to Settings → Guarantees.
-
Click Add Guarantee.
-
Enter a Name: keep it short and customer-friendly (e.g. “7-year warranty”).
-
Add a value badge if you want a detail highlighted next to the name (e.g. “Parts & labour”). Leave it blank to show just the name.
-
Choose an icon from the preset list.
-
Write a description: the full promise the customer reads when they open the guarantee on their quote.
-
Click Save.
The new guarantee is added to your library and is ready to add to quotes.
Managing your guarantees
Section titled “Managing your guarantees”From the Guarantees list you can:
- Edit a guarantee to change its name, badge, icon, or description.
- Duplicate a guarantee to create a similar one without starting from scratch.
- Archive a guarantee you no longer use, to hide it from the list of choices without deleting its history.
- Delete a guarantee you no longer need. If it appears on a quote that has been sent to or approved by a customer, it can’t be deleted. Archive it instead.
Which of these you can do depends on your permissions. If you can only view the list, opening a guarantee shows its details in a read-only view with no Save button. Ask your admin if you need to make changes.
Adding guarantees to a quote type
Section titled “Adding guarantees to a quote type”To make a set of guarantees appear automatically on every new quote of a certain kind, add them to the quote type. When you create a new quote option of that type, it starts with those guarantees already filled in. You can still add or remove them on the individual quote.
Adding or removing guarantees on a quote
Section titled “Adding or removing guarantees on a quote”On a quote option, the Guarantees section sits just under Discount.
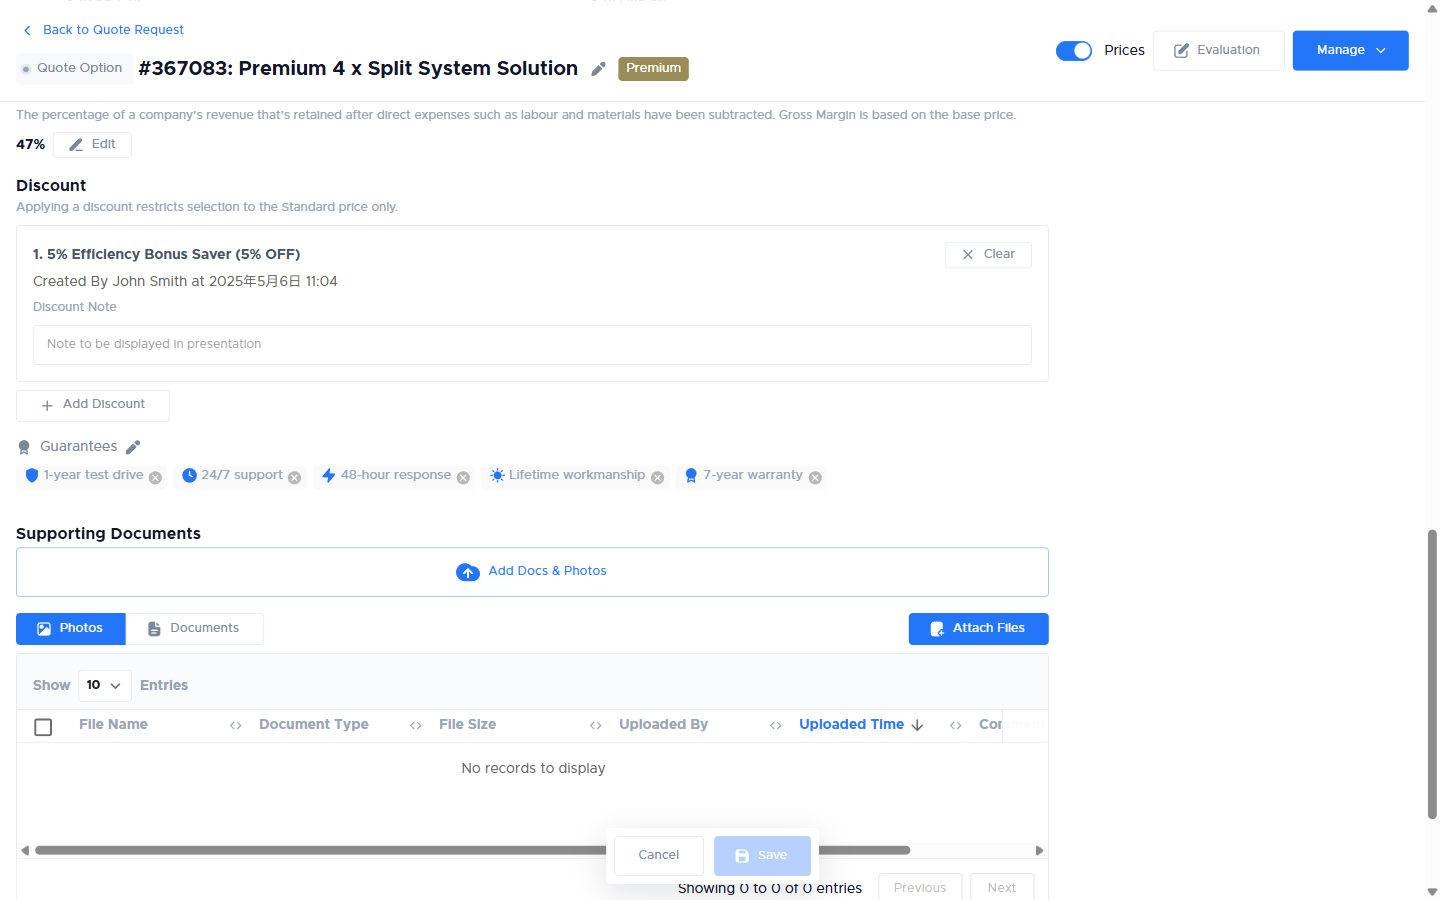
-
Open the quote option and find the Guarantees section.
-
Click Add Guarantee under the Guarantees section to open the picker.
-
Search the library and pick a guarantee to add it.
-
To remove one, click the × on its chip.
-
Save the quote option.
New quote options created from a quote type start with that type’s guarantees. When you duplicate a quote, its guarantees are carried over exactly as they were.
How guarantees look to your customer
Section titled “How guarantees look to your customer”On the customer’s quote, the guarantees you added appear together under a Guarantees heading, each with its icon and name.
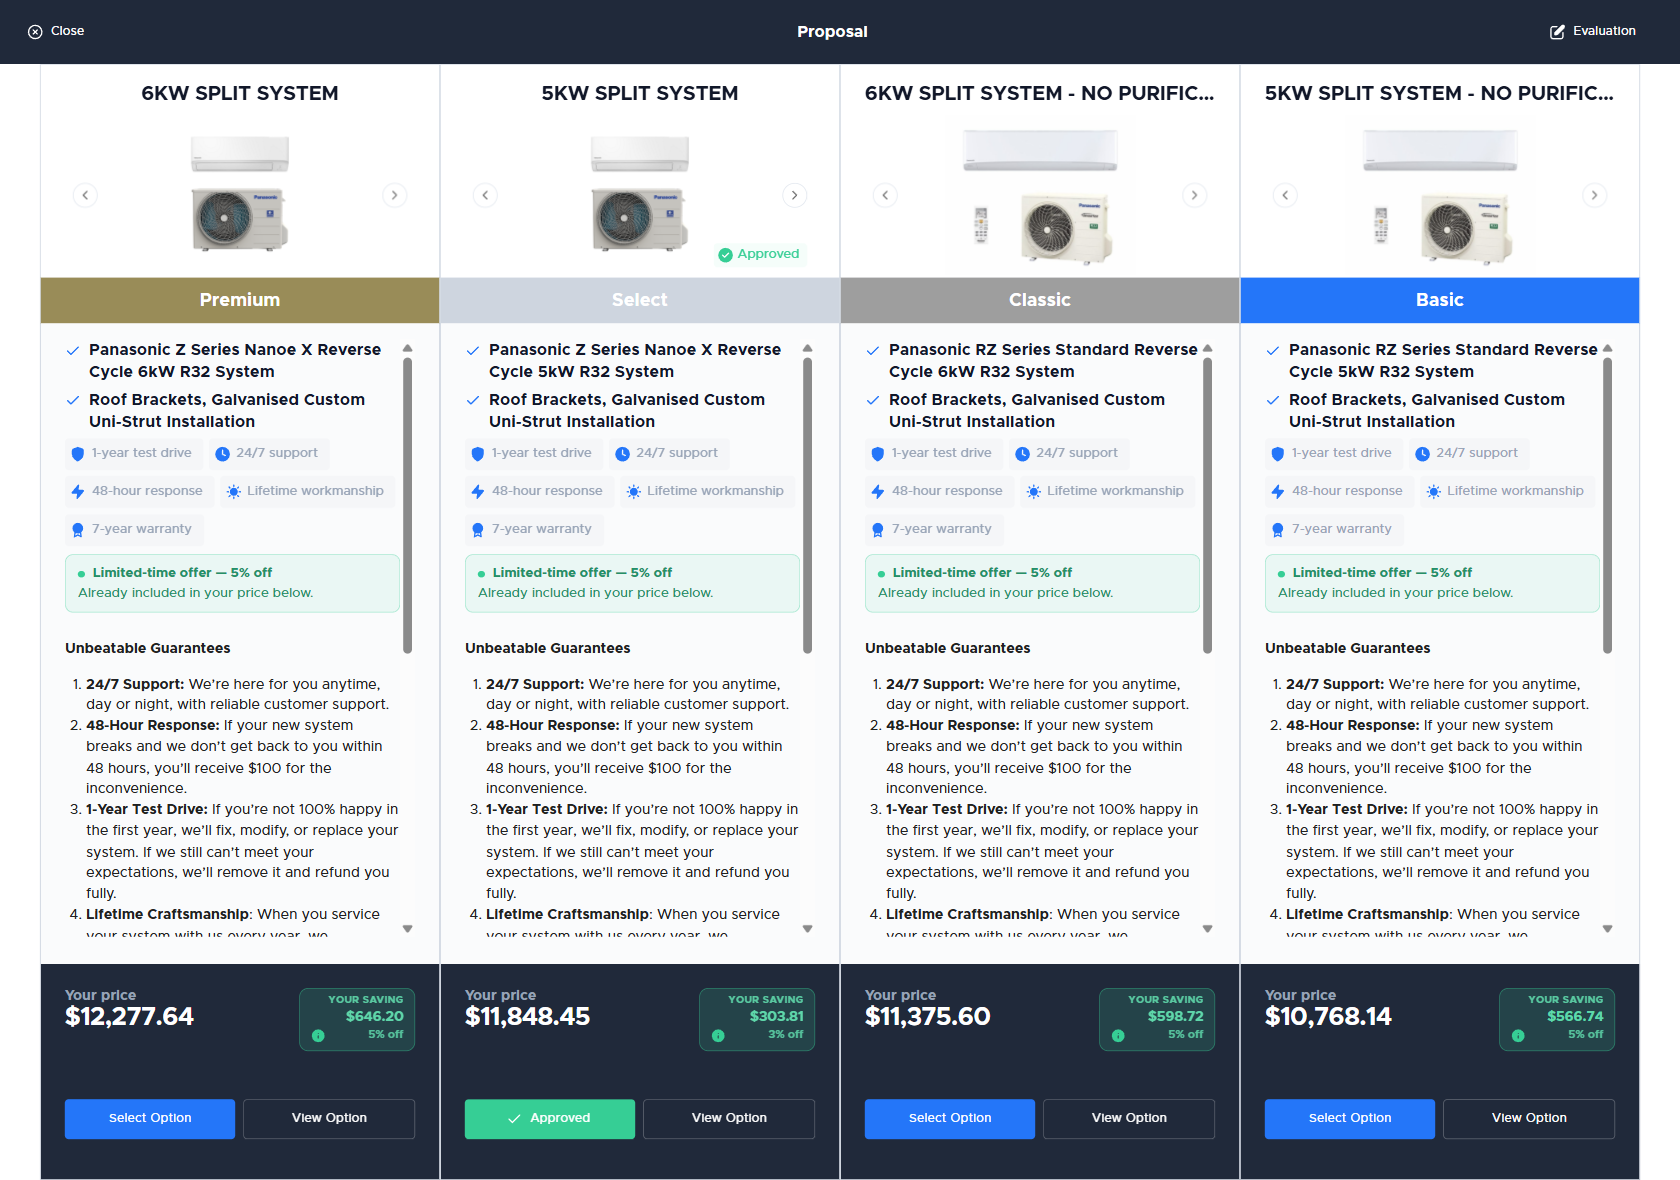
If a guarantee has a description, the customer can click it to open a popup showing the icon, the name, the value badge, and the full description. The same guarantees, with their icons, also print on the quote PDF under the same heading.
What happens next?
Section titled “What happens next?”Setting up your guarantee library is usually a one-time task for an admin. Once it is in place, your team adds the right guarantees to each quote, or lets the quote type fill them in automatically. To set up the promises that print as legal text instead, see Terms & Conditions.
Things to check
Section titled “Things to check”The Guarantees section is empty when I create a quote
The quote’s quote type has no guarantees set as defaults, or the option was created before any were added. Click Add Guarantee in the Guarantees section to add them by hand, or add defaults to the quote type so future quotes include them automatically.
A guarantee isn’t in the picker
It may have been archived. Archived guarantees are hidden from the choices. Go to Settings → Guarantees, switch the filter from Active, and restore it if needed.
I can open a guarantee but there’s no Save button
Your account has view-only access to guarantees. Ask your admin for permission to create or edit them.